# Termy Termy logo *AI CLI-integrated terminal for Obsidian* Powered by xterm.js and a native Rust PTY backend, with split panes, reusable workflows, and file-aware interactions. [![Version](https://img.shields.io/badge/version-1.4.1-7c3aed?style=for-the-badge)](./manifest.json) [![Obsidian](https://img.shields.io/badge/Obsidian-Desktop%20Only-8b5cf6?style=for-the-badge)](https://obsidian.md/) [![Community Plugin](https://img.shields.io/badge/Obsidian-Community%20Plugin-22c55e?style=for-the-badge)](https://obsidian.md/plugins?id=termy) [![License](https://img.shields.io/badge/license-GPL--3.0-blue?style=for-the-badge)](./LICENSE) [![PTY](https://img.shields.io/badge/backend-Rust%20PTY-f97316?style=for-the-badge)](./rust-servers) English / [简体中文](./README_ZH.md) [Install](#installation) · [Quick Start](#quick-start) · [Features](#features) · [Screenshots](#visual-tour) · [Report Issues](https://github.com/ZyphrZero/Termy/issues) · [Telegram](https://t.me/+t6oRqhaw8c1jNzE1)
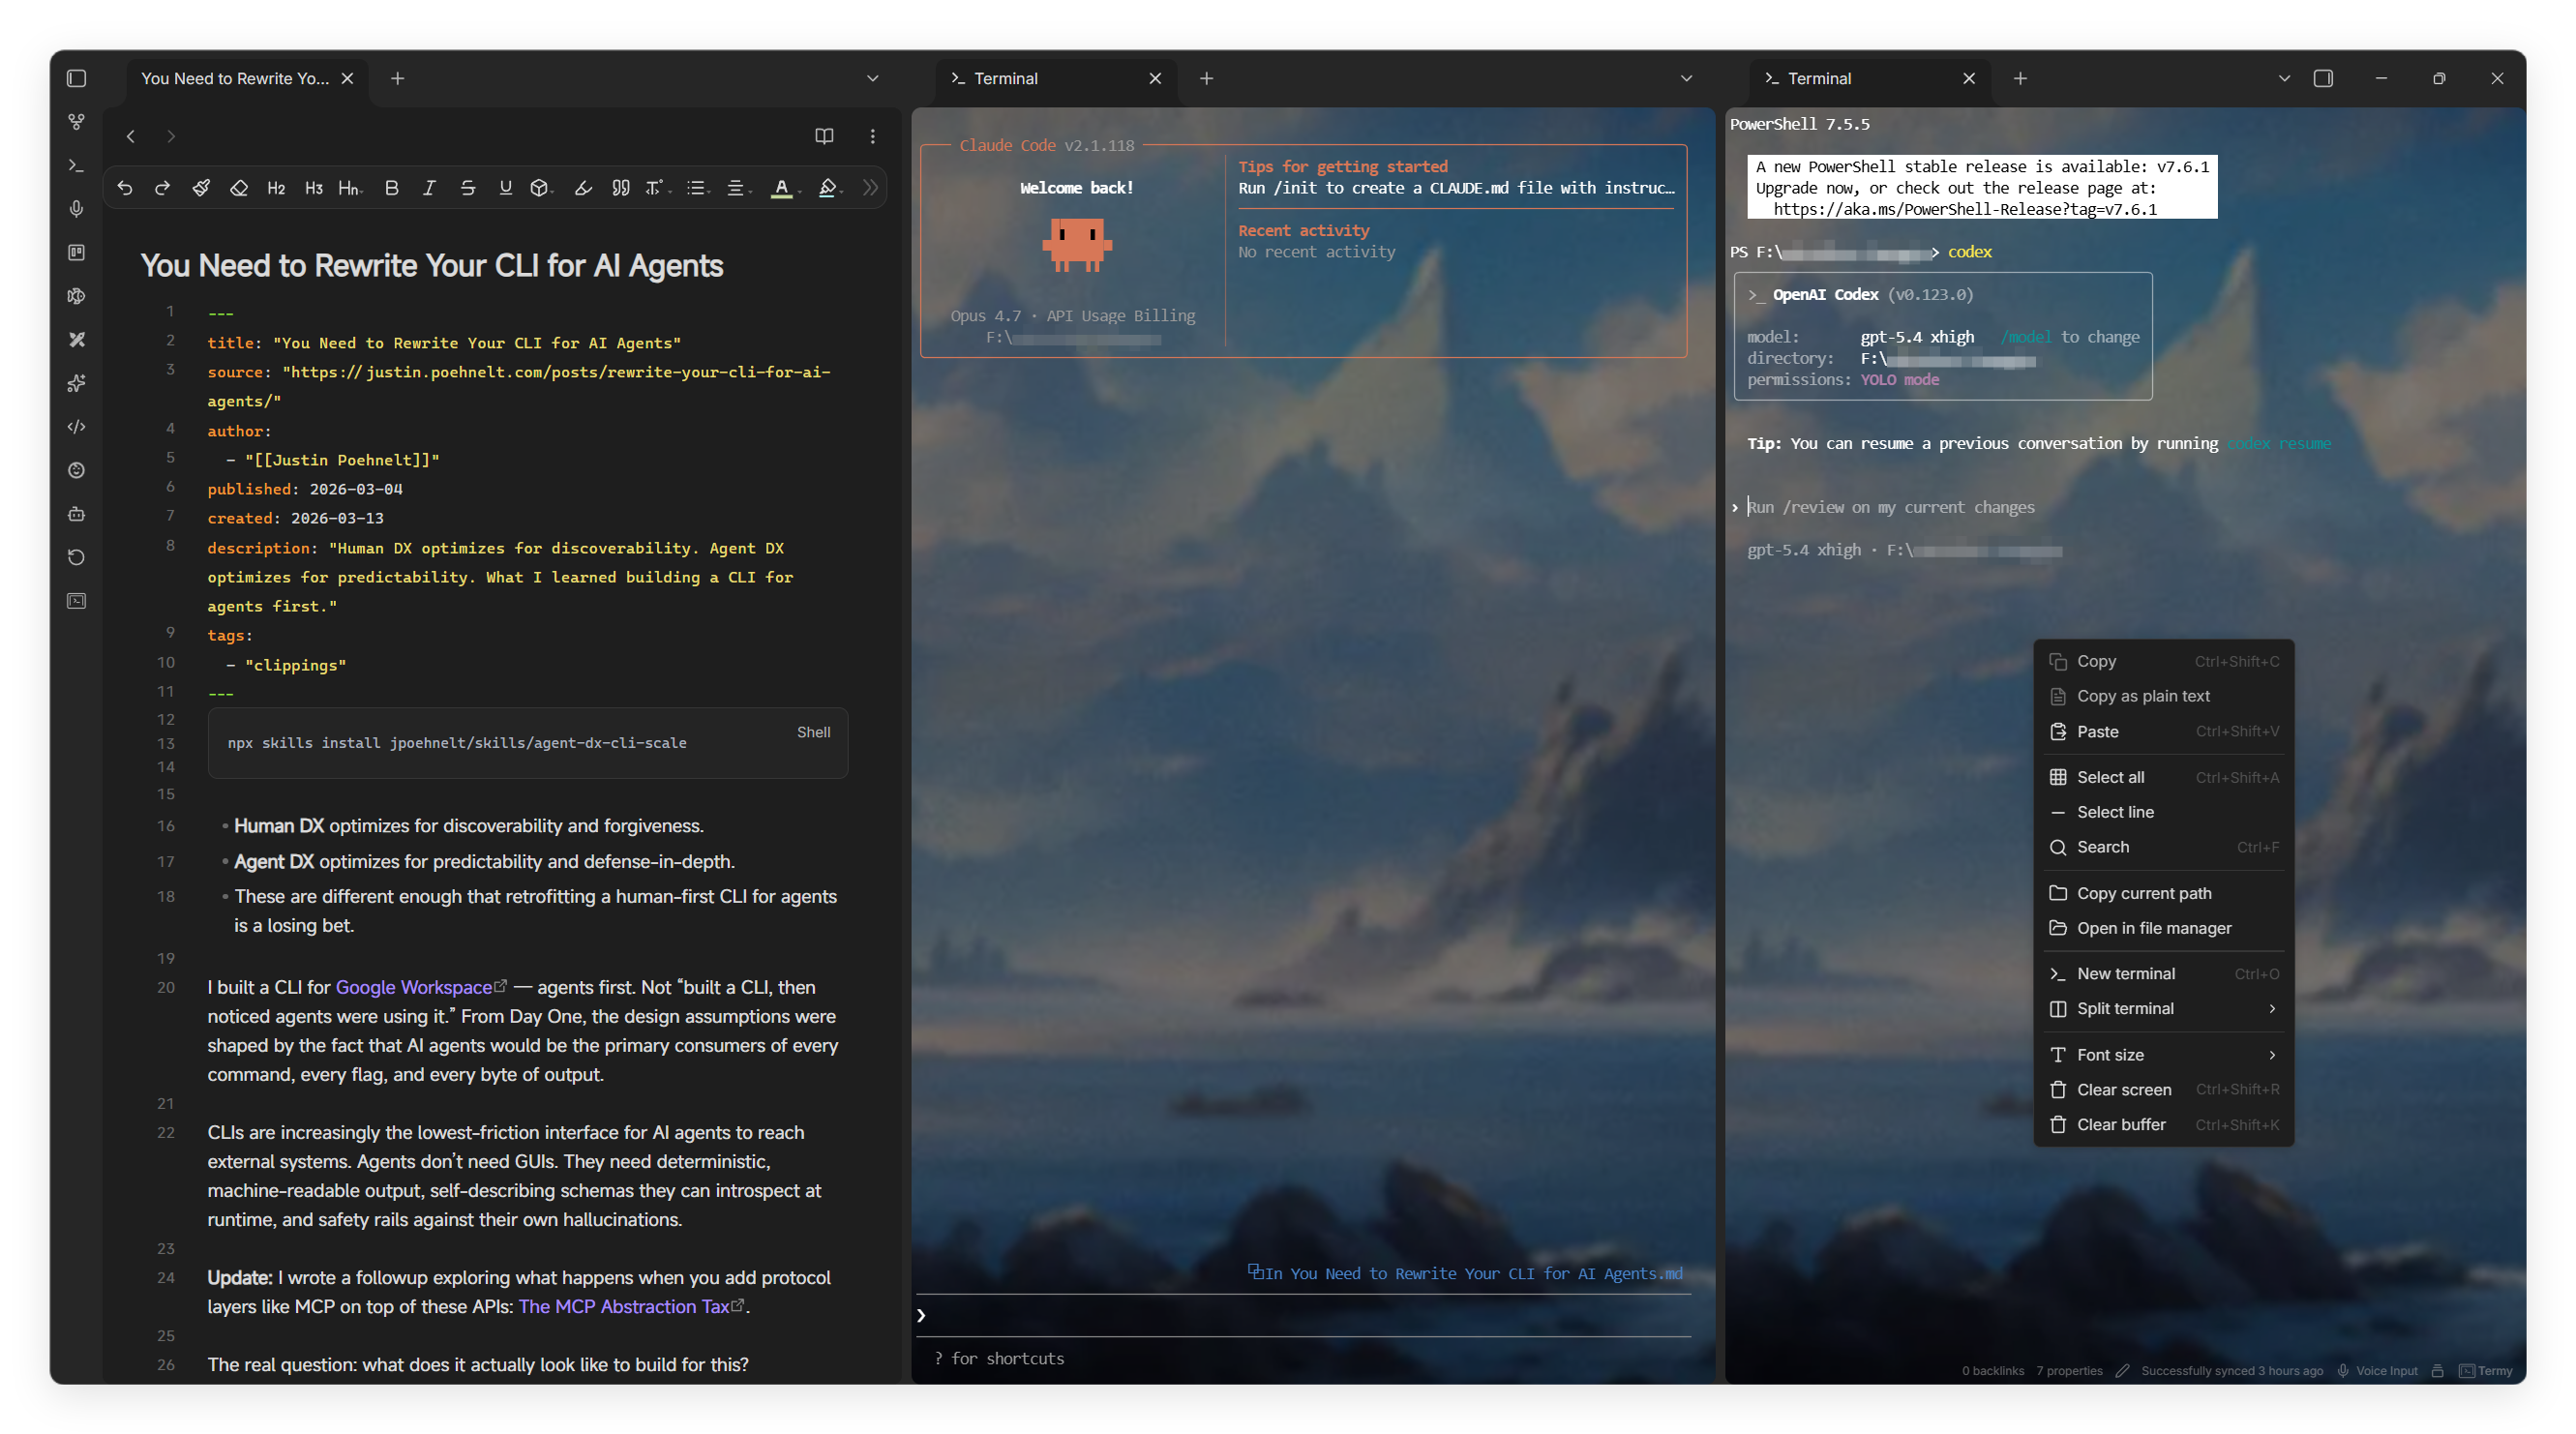
Termy main workspace preview with Obsidian, Codex CLI, OpenCode, and Claude Code

--- ## Why Termy? Termy is built for people who already live in Obsidian and do real work in a terminal. It is designed as more than a terminal pane: it provides a workflow-oriented terminal environment that stays aligned with your vault, editor context, and AI coding sessions. - **Native PTY backend**: Rust keeps the backend lean and avoids extra bridge runtimes. - **Real terminal UX**: xterm.js frontend with search, copy/paste, prompt navigation, split panes, and multi-session support. - **Workflow-driven automation**: Run reusable terminal, Obsidian-command, and external-link workflows from the status bar or command palette. - **File-aware interactions**: Drag text, files, and folders into the terminal and open file references directly from terminal output. - **AI-aware context handoff**: Claude Code, Codex CLI, and OpenCode integrations can inherit active note context from Obsidian. - **Desktop-first customization**: Shell selection, tab/split placement rules, theme sync, background images, blur, renderer controls, and Windows input handling. ## Features ### Terminal Workspace - Run local shells directly inside Obsidian on Windows, macOS, and Linux. - Use `cmd`, PowerShell, PowerShell Core, WSL, Git Bash, `bash`, `zsh`, or a custom shell path. - Open terminals in the current tab, a new tab, left/right tab groups, horizontal/vertical splits, or a new window. - Search terminal output, clear screen or buffer, resize fonts, navigate prompts, and copy/paste normally. - Keep new terminals near existing terminal tabs, focus them automatically, or pin them on creation. ### Workflows & Launchers - Create preset workflows with one or more ordered actions. - Combine terminal commands, Obsidian commands, and external links in a single workflow. - Launch workflows from the status bar menu, command palette, or built-in workflow commands. - Decide whether each workflow appears in the status bar, opens a terminal, starts a fresh terminal instance, or renames the target tab. - Start quickly with built-in launchers for Claude Code, Codex CLI, OpenCode, and Gemini CLI. ### Obsidian Interactions - Send the current editor selection, full note, or active note path into the active terminal. - Drag text, files, and folders into the terminal to paste content or resolved paths. - Click file references printed by tools, agents, scripts, or compilers to reopen matching vault files or external paths. - Open the bundled changelog from the command palette or settings. ### AI & Coding Integrations > [!NOTE] > Claude Code, OpenCode, or Codex sessions started from an external terminal are ordinary CLI processes outside Termy's Obsidian integration layer, so they cannot automatically know the active note, vault/workspace root, or editor selection. - Termy starts AI CLIs inside the current vault context, where the active note, selection, open files, and workspace root can be available to coding tasks. - Claude Code and OpenCode use Termy's IDE bridge; Codex uses a vault-local Skill at `.agents/skills/termy-obsidian-context/SKILL.md`. - The built-in Codex launcher starts `codex` directly, without MCP registration or global CLI configuration changes. ### Privacy and Network Access - Termy does not include telemetry or analytics. - Termy downloads the matching native PTY server binary when needed. The default source is `https://termy.changqiu.xyz`; GitHub Releases can be selected in settings, and offline mode disables automatic download/update checks. - Terminal sessions run local shell commands and user-configured workflows. Those commands may read files, modify files, or access the network according to the shell command or external CLI being run. - Termy starts local WebSocket connections for its PTY backend and optional IDE bridge. These connections are used for local terminal transport and editor-context handoff. - Context-aware AI launchers can pass the active note path, selection, editor context, and vault/workspace path to local CLI tools. The Codex integration writes a vault-local helper skill under `.agents/skills/termy-obsidian-context/`. - Optional: when **Check for AI launcher updates** is enabled in settings, Termy queries `https://registry.npmjs.org` for the latest Claude Code and Codex CLI releases, and `https://api.github.com` for the latest OpenCode release. The setting is **off by default** and offline mode disables it regardless of the toggle. ### Appearance & Ergonomics - Follow the Obsidian theme or use custom foreground and background colors. - Choose Canvas or WebGL rendering, with automatic Canvas fallback when background images are enabled. - Configure background image URL/path, opacity, size, position, blur amount, and text opacity. - Use localized UI in English, Simplified Chinese, Japanese, Korean, and Russian. - Tune Windows-friendly input behavior with `win32-input-mode` support for shells that depend on native key events. ## Visual Tour
Workspace preview

Termy full workspace preview

Workflow UI
Termy workflow launcher menu from the status bar
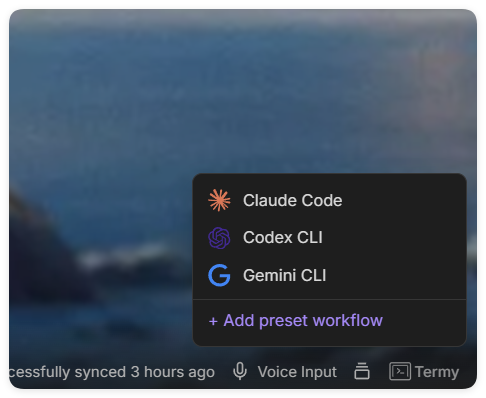
Status bar workflow launcher
Termy workflow settings with built-in Claude Code, Codex CLI, OpenCode, and Gemini CLI entries
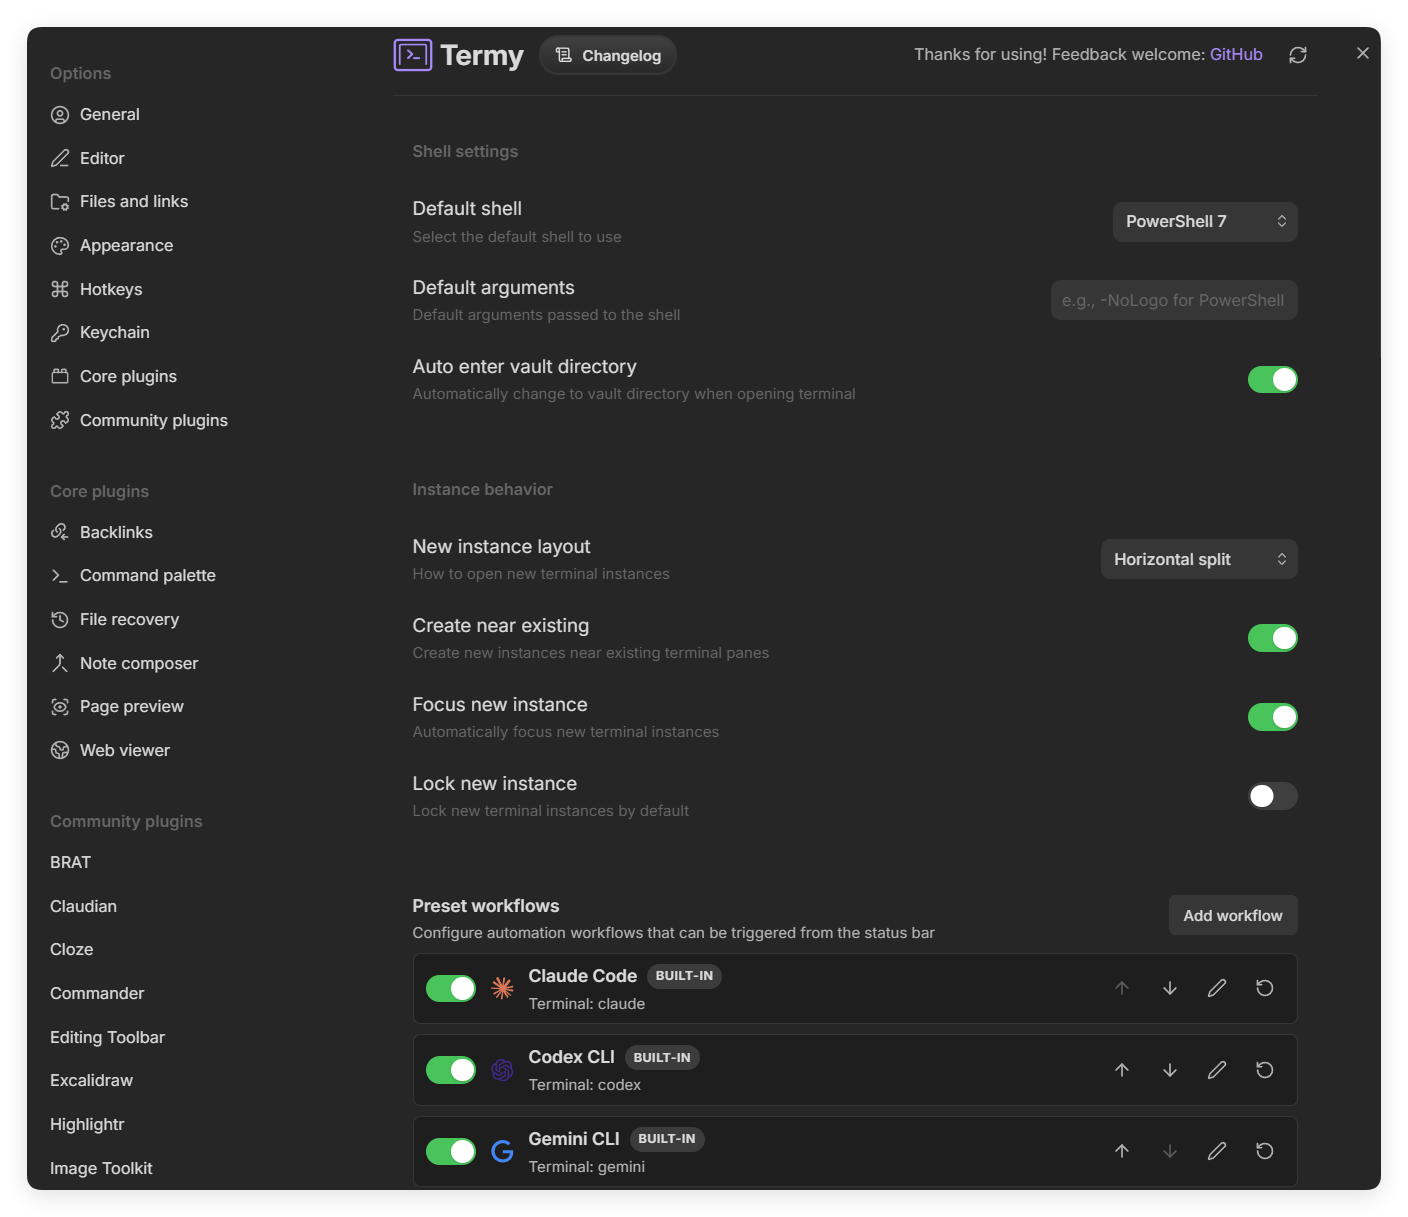
Workflow configuration, instance behavior, and built-in launchers

Termy preset workflow editor with actions, notes, and context-awareness settings
Preset workflow editor with action ordering, notes, and context-awareness controls
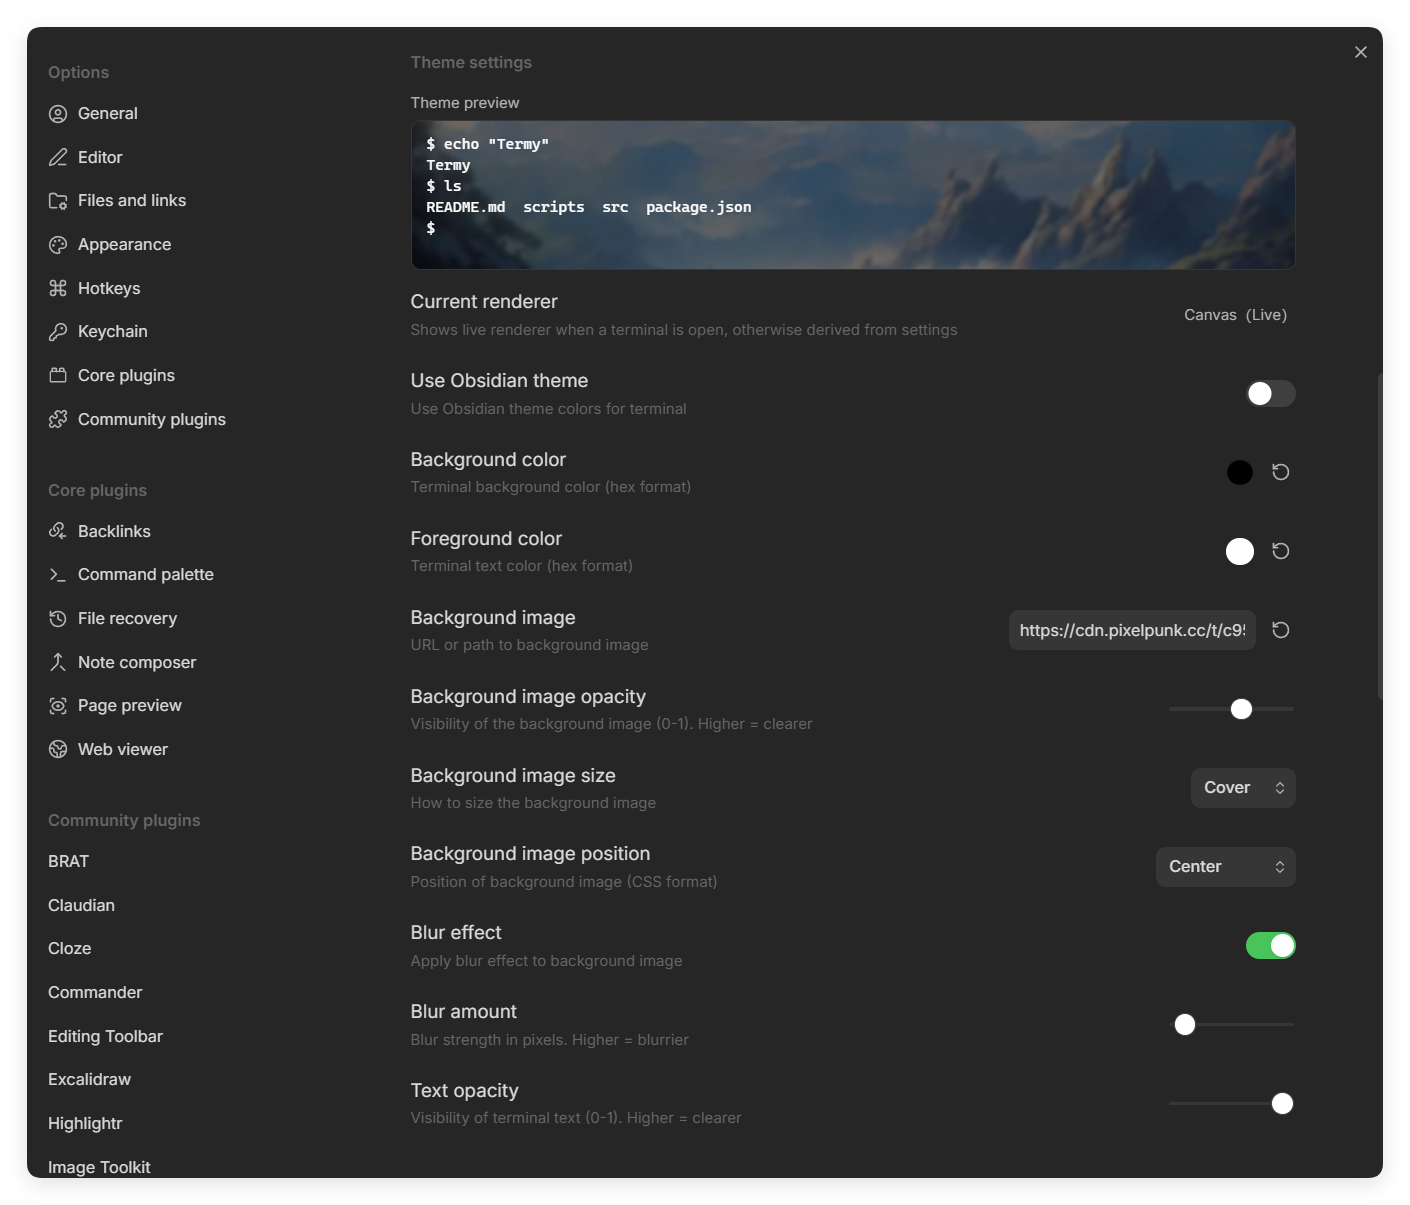
Theme customization

Termy theme settings with background image, blur, and text opacity controls

## Command Highlights | Command | What it does | | --- | --- | | `Open Termy terminal` | Opens a new Termy instance using your configured placement rules. | | `Termy: show changelog` | Opens the bundled changelog modal. | | `Terminal: split horizontal / split vertical` | Splits the active terminal. | | `Terminal: send selection` | Sends the current editor selection to the active terminal. | | `Terminal: send current note` | Sends the full current note content. | | `Terminal: send current path` | Sends the active note path. | | `Terminal: previous prompt / next prompt` | Navigates prompt history. | | `Terminal: last failed command` | Jumps to the most recent failed command when available. | ## Installation ### Requirements - Obsidian Desktop - Windows, macOS, or Linux > [!WARNING] > Termy is desktop-only because it uses a native PTY backend. ### Install from the Obsidian Community Plugins (recommended) Termy is now listed in the official Obsidian Community Plugins directory. 1. Open **Settings → Community plugins** and turn off **Restricted mode** if it is enabled. 2. Click **Browse** and search for `Termy`. 3. Click **Install**, then **Enable**. ### Install with BRAT (early updates) Use BRAT if you want to track the latest tagged build before it ships to the community directory. 1. Install [BRAT](https://github.com/TfTHacker/obsidian42-brat). 2. Open BRAT settings and choose **Add beta plugin**. 3. Enter `ZyphrZero/Termy`. 4. Install the plugin and enable it in **Settings → Community plugins**. ### Manual install 1. Download the latest release from [GitHub Releases](https://github.com/ZyphrZero/Termy/releases). 2. Extract the release files into `.obsidian/plugins/termy/` inside your vault. 3. Reload Obsidian. 4. Enable Termy in **Settings → Community plugins**. ## Quick Start 1. Open Termy from the ribbon, command palette, empty-tab action, or status bar. 2. Choose your shell and terminal placement behavior in settings. 3. Try the built-in workflows from the status bar menu. 4. Send your current selection, note, or file path into the terminal. 5. Drag a file or folder into the terminal to paste its resolved path. 6. Click file references printed by tools or agents to jump back into the matching file. ## Development ```bash pnpm install pnpm build pnpm build:rust pnpm package:zip ``` | Script | Purpose | | --- | --- | | `pnpm dev` | Frontend build/watch flow. | | `pnpm build` | TypeScript check, production bundle, and bundle smoke check. | | `pnpm build:rust` | Build native PTY backend binaries. | | `pnpm package:zip` | Create a release zip. | | `pnpm install:dev ` | Build everything and install into a local dev vault. Pass `--no-rust` to skip the native PTY rebuild when only TypeScript changed. | | `pnpm test:terminal` | Compile and run terminal-layer Node tests. | ## Architecture ```mermaid graph LR A[Obsidian Plugin UI] --> B[xterm.js Terminal] B --> C[Native Rust PTY Server] A --> D[Workflow Launcher] A --> E[Context Services] E --> F[Claude/OpenCode IDE Bridge] E --> G[Codex Skill Context] D --> H[AI CLI Launchers] ``` - **Frontend**: TypeScript, Obsidian plugin APIs, and xterm.js. - **Backend**: Native Rust PTY server built on `portable-pty`. - **AI context**: Claude Code and OpenCode integrate through the IDE bridge; Codex integrates through a vault-local Skill. - **Packaging**: Generated plugin assets are emitted as `main.js` and `styles.css`; native binaries are copied to `binaries/`. ## License Termy is licensed under [GPL-3.0](./LICENSE). ## Credits - [xterm.js](https://xtermjs.org/) - [portable-pty](https://github.com/wez/wezterm/tree/main/pty) ---
**Made with ❤️ for Obsidian power users** If Termy helps your workflow, consider starring the project.